Hey folks!
I'm back today to share a surprisingly easy card with you all! For real, easy. It's a little time consuming, but easy.
If you're interested in any of the products I've used, I have links (some affiliate links) throughout and at the end of the post. Click here to read my full disclosure policy.
Before I get started, I wanted to say that even though I used the MISTI Stamping Tool for this, you DON'T have to. It helps a bunch and certainly speeds up the process, but you can totally do this without it. Think: lots to color, not lots of work.
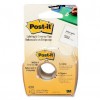
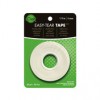
Okey dokey. The first thing I did was make mask of all of the images in the My Favorite Things Funky Flowers Stamp Set with Post-It Tape. I use the 2" wide tape, because of things like this. I've found this is the best tape for masking if you need to reposition them a lot. Plus it's pretty wide so it can accommodate lots of different sized stamps.
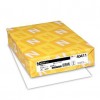
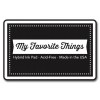
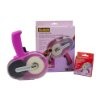
Next, I stamped my first flower in some Neenah White Cardstock with My Favorite Things Black Licorice Hybrid Ink. Again, I used the MISTI Stamping Tool The MISTI is a rockstar for making sure you get a clear, crisp image, buuuut this card is the best example for why I love it so much.
Once, I had my first flower stamped, I masked it off and then started placing my images around it. Since I was using the MISTI, I could stamp more than one image at a time. This folks, is why I love it. It goes super fast. You just need to remember that the image you want "on top" gets stamped first (or second, or third). Capeesh?
After I had all of my images stamped, I colored everything in with Copic's. My color choices are in the thumbnails links below. This would also be fab done in watercolor by the way!
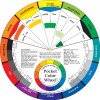
I gotta be honest. I had a really, really hard time deciding what colors I wanted to do these in. The flowers are soo fantastic and I really wanted them to pop. What I ended up doing was deciding what greens I wanted for the leaves first. Leaves are (usually) green so that's easy peasy. Then, I got out my very old, but handy dandy color wheel and starting with yellow-green as my main color, used colors that worked with that.
You definitely don't need a color wheel folks, but they can be nice to have. I'd like to note however, I've linked to the color wheel that I use, but ONLY for reference. I don't remember how much I paid for mine. It was like 14 years ago when I got it, but I certainly didn't pay that much for it. I feel like $2 was a thing....If you really want it and you really want to pay $6 for it go for it, otherwise I suggest you do some looking around for one that's less expensive.
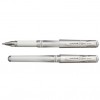
When I had everything colored in I trimmed down the panel, then I added a unicorn level dose of Spectrum Noir Sparkle Pen in Clear to the highlights of the images and added some Uni-Ball Signo White Gel Pen to the flowers as well.
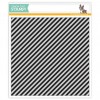
I stamped a piece of Neenah White Cardstock with the Simon Says Stamp Diagonal Stripe Background Stamp using more My Favorite Things Black Licorice Hybrid Ink and trimmed that down to a strip. I also used a very thin strip of My Favorite Things Brushed Gold Cardstock.
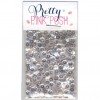
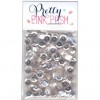
You could totally skip the embellies because this card has oodles of sparkle already, but I decided to add a couple of Pretty Pink Posh Sparkling Clear Sequins because they were sitting right in front of me and sometimes I don't know when to quit.
That's it! Easy peasy.
Thanks so much for stopping by to see me and as always I hope you enjoyed my card today!
Until next time!
Avery Elle Peonies and Copic Coloring
Clearly Besotted and Copic Coloring
Simon Says Stamp June 2016 Card Kit - Look For The Miracles
Wednesday, June 29, 2016

You Might Also Like

















Gorgeous card. Love that SSS diagonal line stamp. Thanks for sharing.
ReplyDeleteYou've been spotted!
ReplyDeletehttp://bit.ly/MFTSpottedJuly19
Susan R. Opel
Creative Ambassador for My Favorite Things
Oh my goodness! Thank you so much! I'm so happy you like it! :)
DeleteYour card is awesome and so beautiful! Congrats on being spotted!
ReplyDelete