Hey folks!
I'm back for my third post in my guest design series for Newton's Nook! Woot!
I gotta be honest, the card I'm sharing with you today is extremely ambitious. It was loads of fun and worth every bit of work that was put in to it. HOWEVER! Don't be intimidated by it. I went totally over the top, but this would be doable on a standard 4.25"x5.5" card panel and just as cute!
If you're interested in any of the products I've used, I have links (some affiliate links) throughout and at the end of the post. Click here to read my full disclosure policy.
I did have had plan mapped out before I started making this card. I knew I would be working with quite a few stamps sets and let's be honest folks, 4"x9" is a pretty big canvas. I was really excited to be able to use 4 stamps set though. I don't get to do that very often. On this card I used: Hanging Around, Naughty Newton, Lovely Blooms and the Versatile Vases Stamp Set.
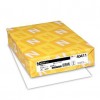
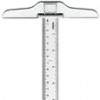
I started by using a T-Ruler and lightly tracing a line just above the bottom edge of my Neenah White Cardstock card panel. I needed this to make sure all of my stamps would line up and I would get the proper perspective. Of course, I couldn't help myself and I ended up adding an entire frame. What d'ya do?
To save myself a little bit of time, I cut multiple masks out Inkadinkado Stamp Masking Paper of all of the images. All of them folks. It is a lot, but the trick is to layer 2 pieces of masking paper. Stamp the one on top and cut out both at the same time.
There was only one stamp I had do make a special accommodation for. This was the stamp from the Naughty Newton Stamp Set. It's the one where Newton is sitting next to the pot that's been knocked over. Since I had cut out 2 masks of this image, I took one and carefully trimmed Newton from around the pot. I left the other mask intact.
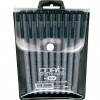
I placed my panel in a MISTI Stamping Tool and placed the 2 piece mask on the panel where I planned on stamping my image. Then I placed the stamp over the top of the mask. I made extra sure it was line up properly. When I had it where I wanted it, I removed the pot portion of the mask, leaving Newton in place. I didn't ink the entire stamp, I went a little over onto Newton, but it's no big because we have a mask in place. I removed the mask and with a Copic Multiliner, I drew in the rest of the pot.
For the rest of the stamping, I stamped the rest of the images that are in the front, then started working my way backwards. The other trick for something this size is to work from both ends towards the middle of the panel. Stamp as many images at one time as possible. It's a huge time saver aaaaand it really helps to give you an idea where spaces need to be filled. The Versatile Vases Stamp Set has lots of choices and fillers for this!
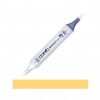
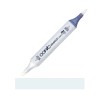
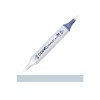
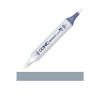
After all of my images were stamped, I colored them all in with Copic's. You can see the thumbnail links below for my color choices. The largest jar is from Lovely Blooms Stamp Set and the hanging Newton is from the Hanging Around Stamp Set. They fit together perfectly!
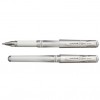
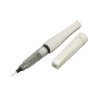
To finish it off, I added some detail with a Signo Uni-Ball White Gel Pen and a Clear Sakura Glaze Pen. Also, no card is complete without a little bit of Clear Wink of Stella.
That's it.
I hope you enjoyed my card today and thanks so much for stopping by to see me!
Until next time!
Monday, July 24, 2017

You Might Also Like

















This card is truly a labor of love! All those jars!!!! I am astounded by your gorgeous scene making ability! Plus Newton is too darned cute in that big jar! We really enjoyed having you as our guest!
ReplyDelete-Jen {Newton's Nook Designs}
This comment has been removed by a blog administrator.
ReplyDelete