

I'm here today to share with you the first in a 3 part card making series focusing on scene building. I see all the time, where folks talk about how masking and making scenes is hard. It's not. I promise. Masking and building a scene is simply time consuming. Honest. This is a long -ish post as I have a few things to say so hang in there with me.
If you're interested in any of the products I've used, I have links (some affiliate links) throughout and at the end of the post. Click here to read my full disclosure policy.

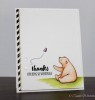
You can see the video of Part 1 by clicking HERE or by clicking on the image below.
I split the videos up into three parts for a couple of reasons. I will share each one over the next couple of days. I wanted to break each one down so if you're not interested in seeing all of it, you could just focus on each specific part and also, they are loooong. I will (hopefully) have the video loaded in it's entirety if anyone is interested in watching all of it in one sitting. I call these videos Coffee Videos. Ya' know, I sit down with my cup of coffee and watch until my coffees gone. Then sometimes I make another cup and watch some more!
So, I really think the first thing to keep in mind is, cards like these are a journey, not a destination. If you need a card in a hurry, then these wouldn't be a go to. If you want to enjoy the process of building something spectacular for someone (or yourself), then this is the ticket. I like to work on these over time, but I will also have other faster cards in the works at the same time. I get the best of both worlds that way.
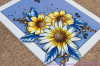
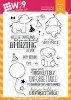
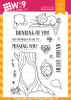
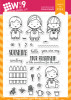
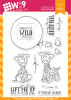
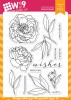
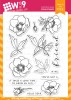
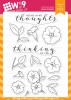
My focus on all of these cards were Wplus9 stamps, but you could totally use anything you like. I encourage you to go through your stash or when you're shopping for new sets and think outside of the box. The possibilities are endless. For today's card, I used Unforgettable, A Pocketful: Valentine, Fresh Preserves and Sweets & Treats.

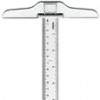
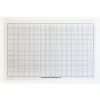
Don't be afraid to stamp out a plan before you start folks. I actually do this a lot, I generally just don't share it. I can see the images in my head and I can see how they will fit together in my mind's eye, but it can be super helpful to put it on paper first. Copy paper is really inexpensive and they are YOUR stamps. Use them. Nobody is going to judge you for using the stamps you paid good money for. There isn't a cardinal card making rule that says, you can only use a stamp set once, then you need to put it away. I promise the folks that create them and sell them will be happy you've made good use of them!
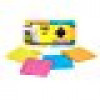
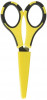
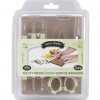
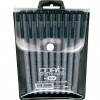
Also, the type of masking paper you use can make a huge difference. I love, love, love 3M Full Stick Post-It Notes. I'm certainly not the first to use them this way, but they are a game changer. You stamp your images on the top and peel off as many sheets as you need and cut them out at once. Bada-bing bada-boom, you have oodles of masks. Love. It. I will stamp mine and sit and watch t.v. while I cut them out. It's groovy. Don't forget a really good pair of small sharp scissors. I will have a links to some that I think are pretty fab below.

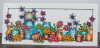
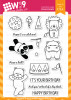
I talk about this more in today's video, but for you folks that are read/write learners, I wanted to talk about in what order images get stamped in scenes. Now there are some exceptions to this, but for the purpose of today's card this is how it works. The picture above is a copy of my plan. I colored all of the images in rainbow order so you have a better idea what I mean when I say you always stamp your foreground images first. Everything in pink was stamped first, then red, then orange and so on until all of your images are stamped. Make sure to vary the height of each image. Images stamped further in the back will almost always get stamped higher on the panel.
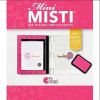
I know it seems CUH-razy to stamp out those teeny tiny lil things and then mask them, but it's totally worth it! Sometimes it's the little things in life peeps. I'll be honest, using a stamp positioning tool, like the MISTI Stamping Tool helps a bunch, but don't think you can't do it if you don't have one. Now I strongly suggest that everyone invests in a MISTI, because that are brilliant for card making, but hey that's just my opinion. I have the Memory MISTI, the Original MISTI and the Mini MISTI. That makes me a maniac, but if you decide to invest in one, you can't go wrong with the Original MISTI.

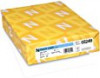
Another thing to keep in mind, is you can make your cards ANY size you like. I love 4"x9", but as you can see, 4.25"x5.5" works too. You can do 5"x5" or 6"x6". Whatever floats your boat. For all of my cards, I used Neenah Solar White 80# Cardstock. This is an excellent cardstock for Copic coloring, but also it's a good solid weight for one layer cards.
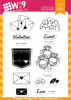
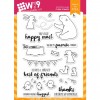
For the card pictured above, I used A Pocketful: Valentine, Forest Friends, Curious Forest Friends, Unforgettable, Fresh Preserves and Sweets & Treats. Show of hands of who wants a forest themed birthday!
In the next video, I will talk about how I choose my colors and why. I will list all of the Copic's I used for the main card featured in todays video, in that post.

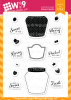
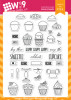
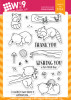
For this card I used, A Pocketful: Valentine, Sweets & Treats, Unforgettable, Fresh Preserves, Big Deal and Garden Buddies. That's A LOT of stamp sets! I always feel crazy accomplished when I can use loads of sets at one time.
It's helpful to have an idea how you want to color your scenes when you start them, but it's not overly important. Really it comes down to the type of paper and ink, then your color choices can come later. Which is why all of that info will be in the next video.
That's it!
I really hope you enjoyed the first part of this series folks. Tomorrow I will be back with the second. Thanks so much for stopping by and be sure to head over to my YouTube channel and subscribe!
Until next time!
 |  |  |  |
 |  |  |  |
 |  |  |  |
 |  |  |  |
 |  |  |  |
 |  |  |  |
 |  |  |  |
 |  |  |  |


Gorgeous card and very detailed video! I love the rainbow masking idea. I always have to stop and think when I'm stamping about what order to stamp in. This gets all that thinking out of the way first :)
ReplyDeleteThank you! I'm so glad I could help! I think masking is under appreciated, but it's such a great way to get some use out of all those stamps we buy!
Delete